
Whenever you upload a video to YouTube and the server is not happy about your codec settings it mentions that you should use these settings for better quality of your upload. I assume that using the correct settings prohibits reencoding the video on the servers. For years now I didn't care but on my last uploads I got encoding problems and video artifacts and now wanted to have the correct configuration in my setup.
The ffmpeg configuration suggested from mikoim is this one:
ffmpeg -i input -c:v libx264 -preset slow -profile:v high -crf 18 -coder 1 -pix_fmt yuv420p -movflags +faststart -g 30 -bf 2 -c:a aac -b:a 384k -profile:a aac_low output
The current release of Cinelerra removed the possibility to enter a custom ffmpeg command line in favor of a rather confusing graphical interface which is easy to learn but difficult to master.
- Select FFMPEG as file format
- Select mp4 as output
- Activate Audio and open Audio Dialog
- Select h264.mp4 as profile which means AAC by default.
- Enter this in the Options field:
profile=aac_low - Enter 384000 into bitrate and -1 to quality.
- Close Audio Dialog.
- Activate Video and open Video Dialog
- Select faststart_h264.mp4 as profile.
- Set Bitrate to 0, Quality to -1 and Pixels to yuv420p
- Enter this in the Options field:
bf=2
coder=1
crf=18
profile=high
preset=slow
x264opts cabac=1:keyint=25
- Close Video Dialog
- Render! Yeah!
In case you want it more graphic here you go.
My Cinelerra is set to german but it should look exactly the same.
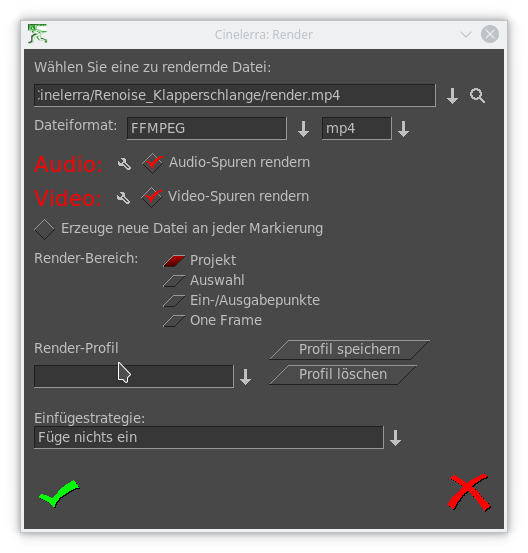 |
| Render Settings |
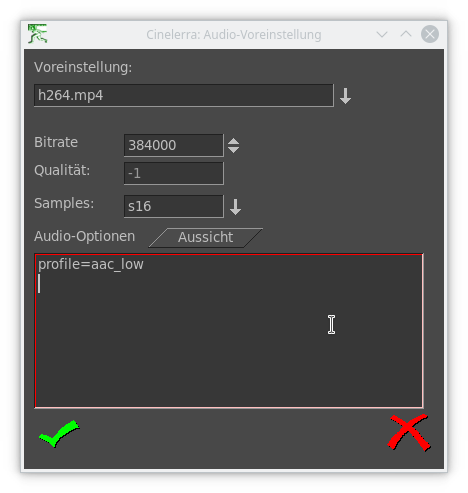 |
| Audio Dialog |
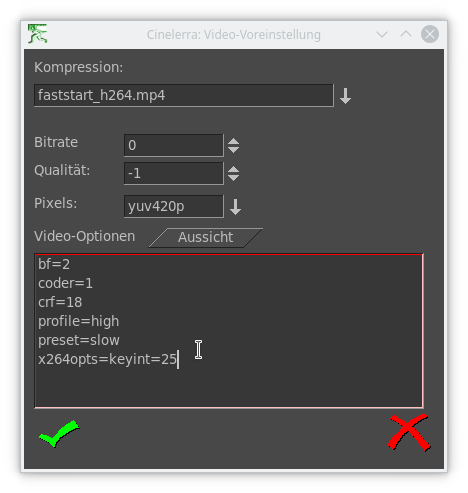 |
| Video Dialog |
No comments:
Post a Comment